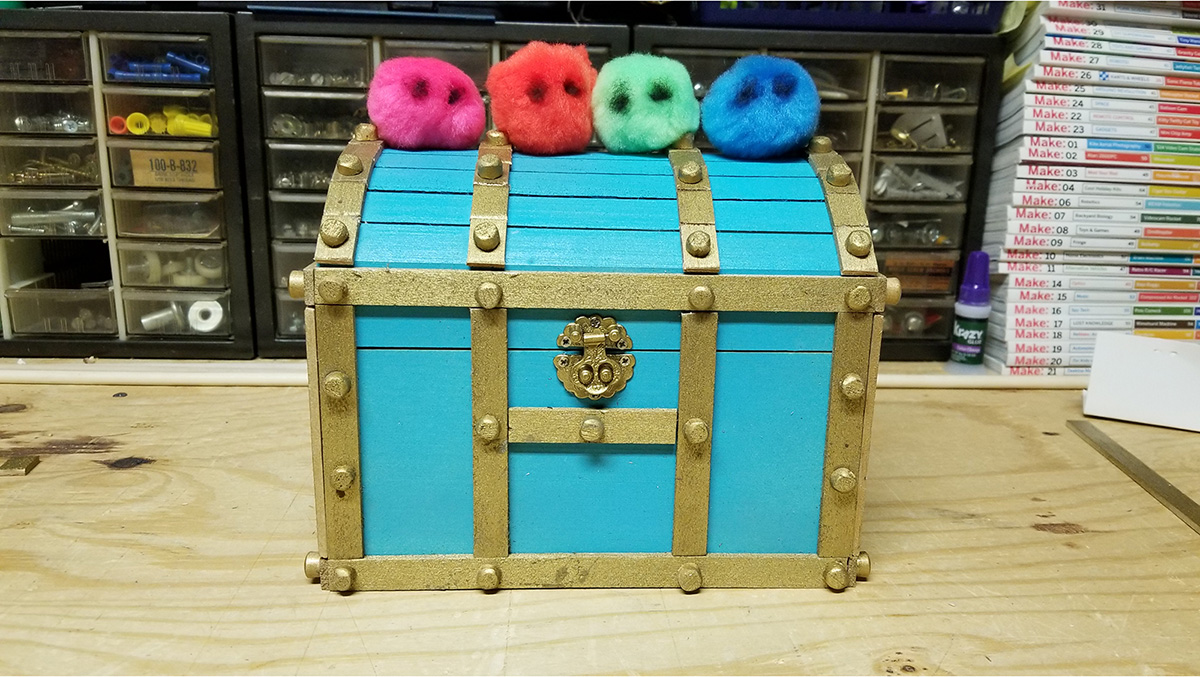
My daughter loves the show, “Tumble Leaf”. I thought it’d be a great way to both fun to bring her show to life and teach here about every day objects so I built her a “Finding Place”.
Building a real Finding Place was both fun and rewarding. Watching her face light up as she pulled something new out of the treasure chest every day was awesome. We had some frantic mornings just like when you forget to move the “Elf on the Shelf” because we occasionally we forgot to put something in there (read on for how to solve that problem).
Materials
- Cheap pre-made treasure box
- Wood stain marker (or a can of stain and a brush). #235 Cherry gave the look I was after
- Glue
- Wooden Dowel (3/8”)
- Thin, flat wood strip (1/4” x 1/8”)
- Paint (blue & gold)
- Fuzzballs (for the barnacles)
- Black sharpie
- Thin, braided rope/twine
Steps
1) Cut
- (A) Cut the wooden dowel into 1/4” pieces.
- You’ll want enough pieces to place all over the treasure box so it looks like its bolted together
- Sand the top edges around to give it a hand-made beveled look
- You’ll need about 40 of them.
- Make extras because they sometimes come loose and roll to unreachable areas under your couch
- (B) Cut the thin strips of wood into short pieces to look like reinforcements
- If you use balsa it’s soft enough to just cut with scissors
- Lay the strips out around the treasure chest to make sure the pieces fit together
- The lid will need lots of small pieces
- (C) Drill two holes on either side of the treasure box to create “handles” from string
INSERT SANDING IMAGE
2) Paint
- (A) Stain the inside of the treasure chest
- The marker takes longer than a brush or rag would, but it creates a interesting wood-grain effect.
- (B) Paint the outside of the box
- Be sure to take the metal latch off before painting
- (C) Paint the thin wood strips gold
- (D) Paint the dowel gold
- You also need to paint the tops after we sand them
3) Glue
- (A) Layout the strips around the box
- You don’t have to use this pattern. I played around until I found one I liked.
- (B) Glue the painted wooded strips around the box
- I used Krazy glue for everything because it dries fast & I was in a hurry. Clamping everything down and using wood glue would have required forethought
- (C) Glue the knobs around the box
- Don’t forget the sides too!
- (D) Glue the top strips
- It looked way cooler with the gold parts across the top too
4) Finishing Touches
- (A) Thread some twine/string through the side holes to create handles.
- Leave enough extra on the inside to tie knots so they don’t pop out
 Treasure box (before)
 Stain marker
 Krazy Glue
  Barnacles
  Turquoise & gold paint
  Thick string
  My fine-toothed saw was MIA so I attacked it with this beast
  Snip snip
  I forgot to take a picture of the holes, but you can get the idea
  Inside of the treasure chest before stain
  Stain the inside of the treasure chest
 Remove the lock
  Paint the wood parts gold
  Gather all the wood parts ready to glue
  Glue the strips to the box
  Glue the knobs on
  Handles outside
 Handles inside
 Done!
Done! Party with Stick and tasty barnacles